Environment Preparation: VSCode Online
🌐💡 VSCode Online: Your Cloud Playground
Welcome to your cloud-powered dev playground!
Let’s get you connected, coding, and exploring MongoDB in style.
Quick Check: Navigate to https://<customer>.mongogameday.com/ and verify your name appears in the participant list. If it’s not there, please ask your SA before proceeding.
🚀 Step 1: Backend Setup
- Access VSCode Online:
Note: You can skip this step if you’ve already opened your VSCode Online environment via the link above.
- Open your VSCode environment:
https://<username>.<customer>.mongogameday.com/ - In the
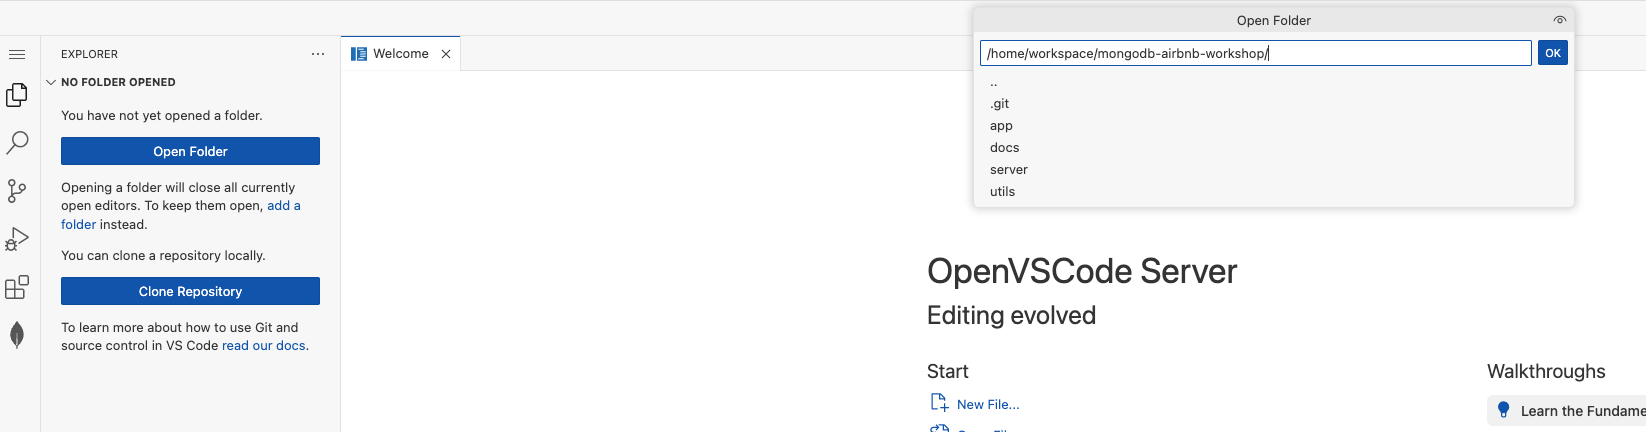
Explorer, click Open Folder and navigate to:/home/workspace/mongodb-airbnb-workshop/Click Ok.
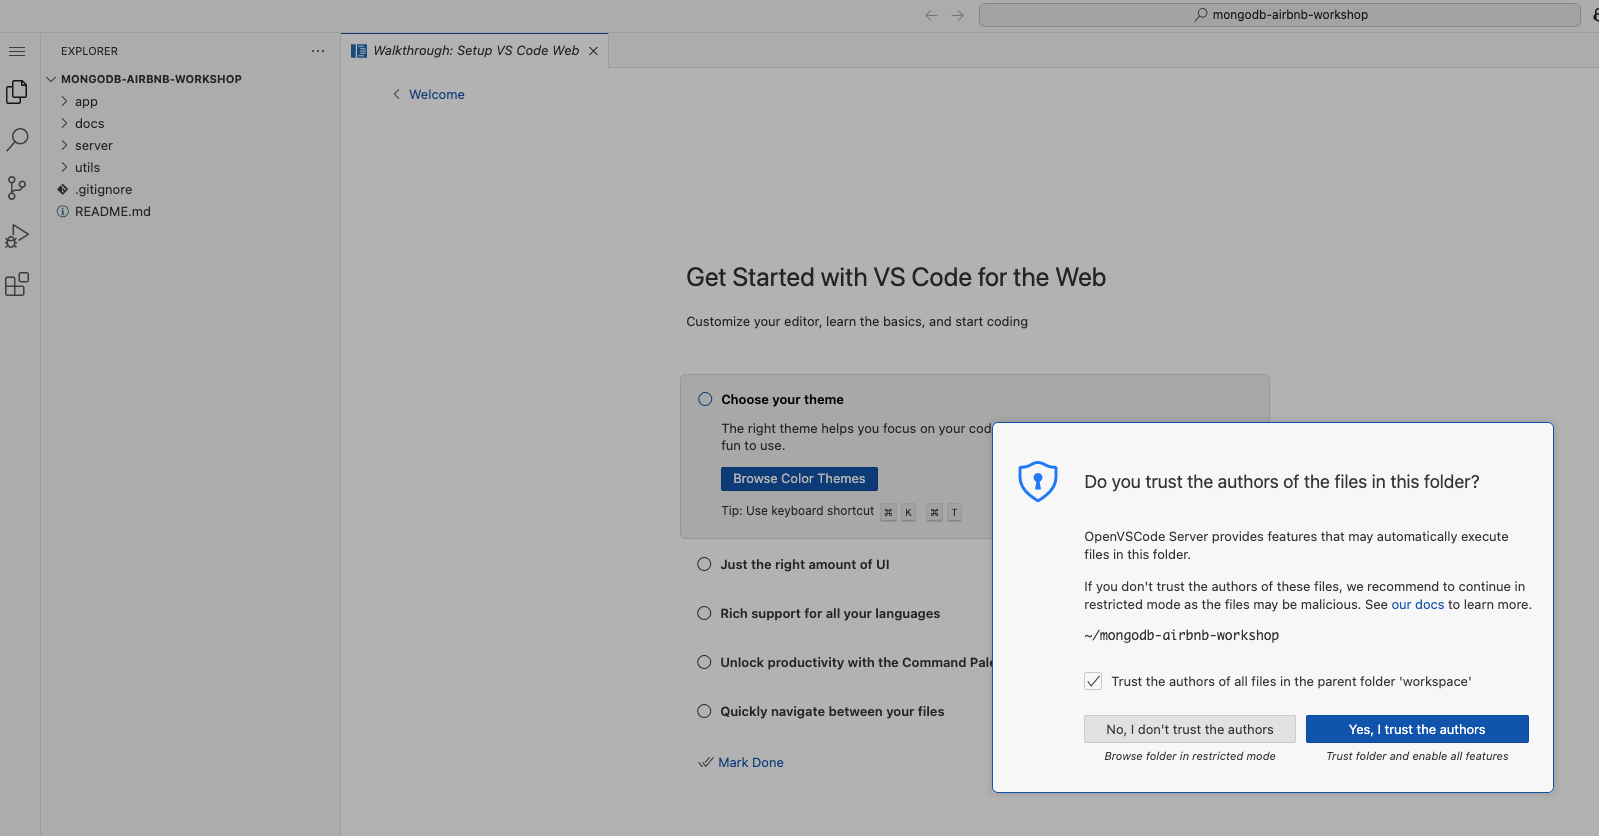
- When prompted, select Yes, trust the author.
- Open your VSCode environment:
- Start the Server:
- Open a new terminal:
☰ > Terminal > New Terminal - Fire up the backend:
cd server npm start - Check the console logs—if you see a MongoDB connection message, you’re golden!
- Open a new terminal:
🎨 Step 2: Frontend Setup
- Launch the Frontend:
- Open your app in the browser:
https://<username>.<customer>.mongogameday.com/app/ - See your name on the homepage? You’re in!

- Open your app in the browser:
🔗 Step 3: Connect the MongoDB Extension
- Grab Your Connection String:
- Open
/server/.envand copy your MongoDB URI:MONGODB_URI=`mongodb+srv://<username>:<password>@<cluster>.mongodb.net`/?retryWrites=true&w=majority
- Open
- Connect in VSCode:
- Click the MongoDB extension in the sidebar.
- In CONNECTIONS, hit the + and choose Connect with Connection String.
- Paste your URI and connect!
- Success Check:
- If you see your databases, you’re ready to roll!
🛠️ Troubleshooting
-
Server not starting?
Double-check your terminal commands and directory. -
Still stuck?
Ping your SA for help—no shame in asking!
✨ That’s it! You’re set to code, create, and explore.
Happy hacking!