Environment: VSCode
🌐💡 VSCode Online: Your Cloud Playground
Welcome to your cloud-powered dev playground!
Let’s get you connected, coding, and exploring MongoDB in style.
🚀 Step 1: Backend Setup
- Access VSCode Online:
- Navigate to the Arena Portal and verify your name appears in the participant list. If it’s not there, complete the “New to Arena?” form.
- Open the
Workspace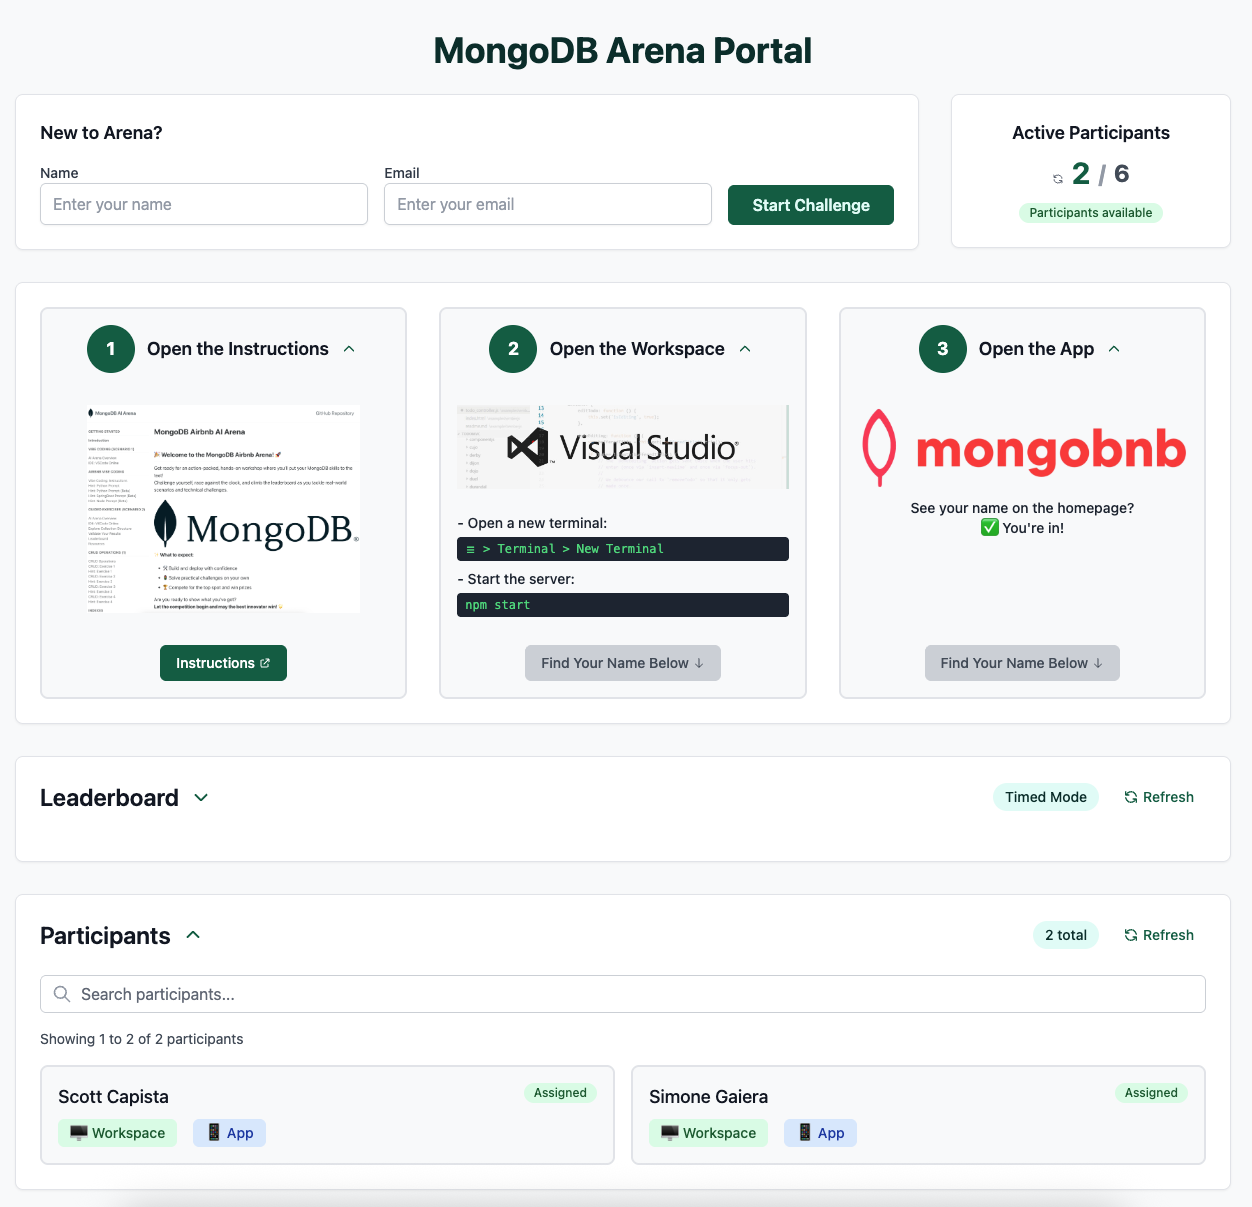
- Trust the Workspace:
- When prompted:
- Click Yes, I trust the author
- Click Mark Done
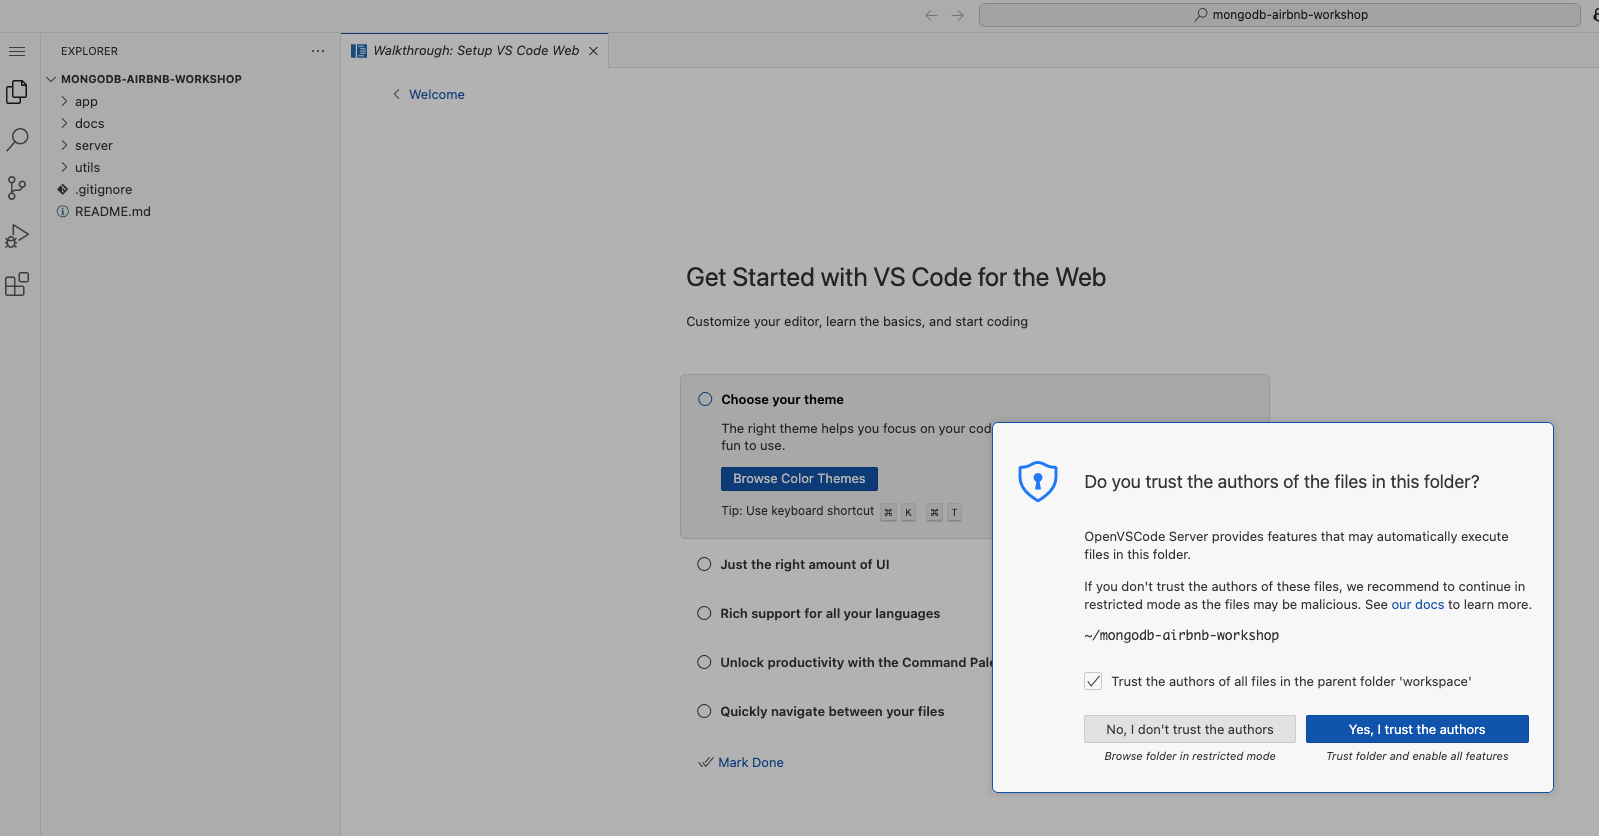
- When prompted:
- Start the Server:
- Open a new terminal:
☰ > Terminal > New Terminal - Fire up the backend:
npm start - ✅ Check: If you see a MongoDB connection message in the logs, you’re good to go!
- Open a new terminal:
🎨 Step 2: Frontend Setup
- Launch the App:
- Navigate to the Arena Portal and open the
App
- Navigate to the Arena Portal and open the
- Validate the Frontend:
-
See your name on the homepage? ✅ You’re in!
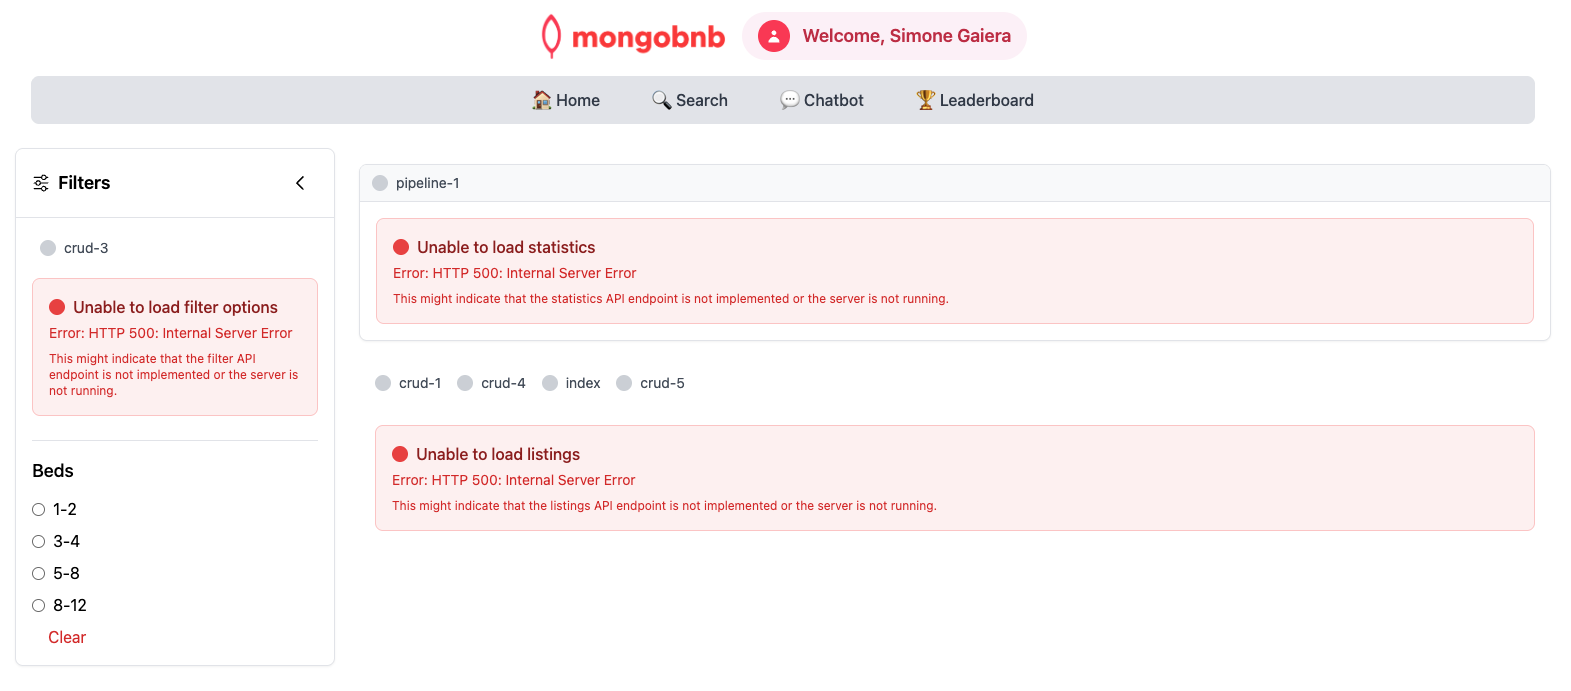
- If you see the error message instead of your name, double-check that your backend server is running.
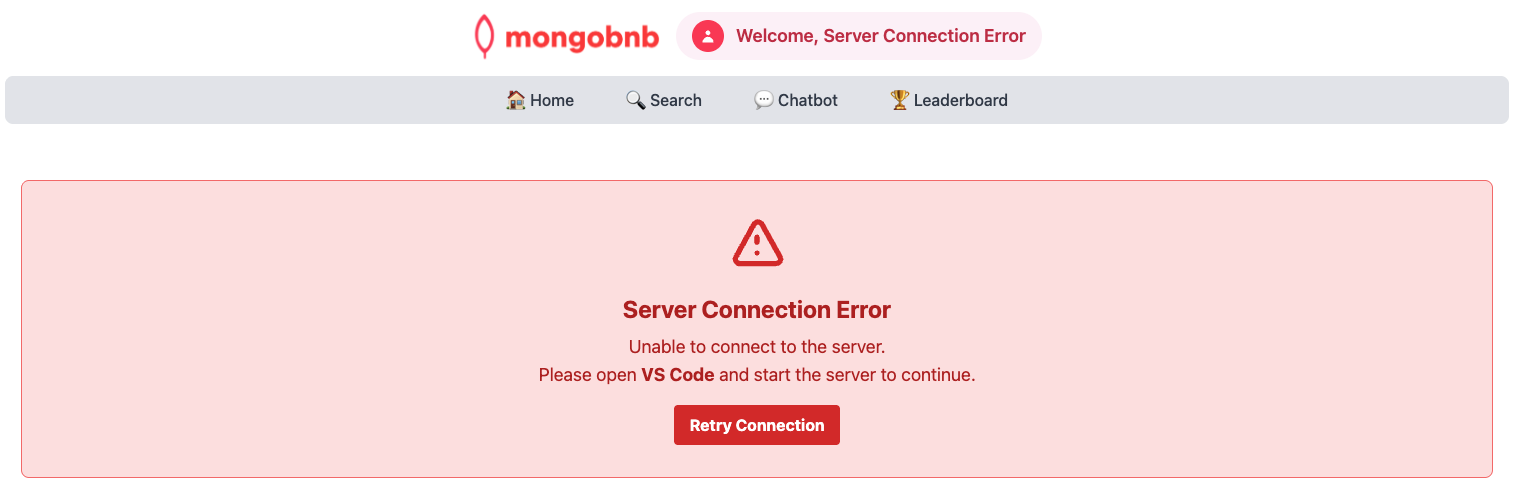
- Still not working? Call your SA for help!
-
🔗 Step 3: Connect the MongoDB Extension
- Grab Your Connection String:
- Open
.envfile and copy your MongoDB URI:MONGODB_URI=`mongodb+srv://<username>:<password>@<cluster>.mongodb.net`/?retryWrites=true&w=majority
- Open
- Connect in VSCode:
- Click the MongoDB extension in the sidebar.
- In CONNECTIONS, hit the + and choose Connect with Connection String.
- Paste your URI and connect!
- Success Check:
- If you see your databases, you’re ready to roll!
🔗 Step 4: Use MongoDB Playground
- Open the MongoDB Playground:
- In VSCode Online, locate and open the file
find-playground.mongodb.js(usually found in the bottom left of the Explorer).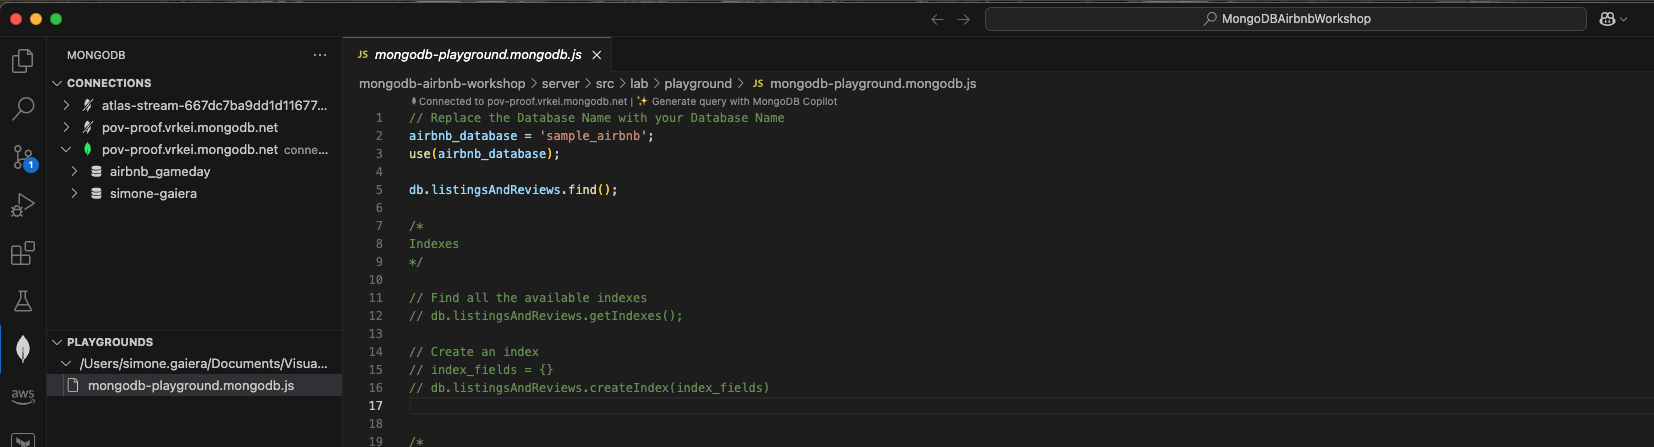
- In VSCode Online, locate and open the file
- Set Your Database:
- Find the line:
airbnb_database = 'sample_airbnb'; - Replace
'sample_airbnb'with your own database name:airbnb_database = '<DATABASE_NAME>';
- Find the line:
- Run Your First Query:
- Click the Play ▶️ button at the top right of the editor to execute the playground script.
- Check the Results:
- If your query runs successfully and returns data from your database, you’re all set!
- If you see errors, double-check your database name and connection.
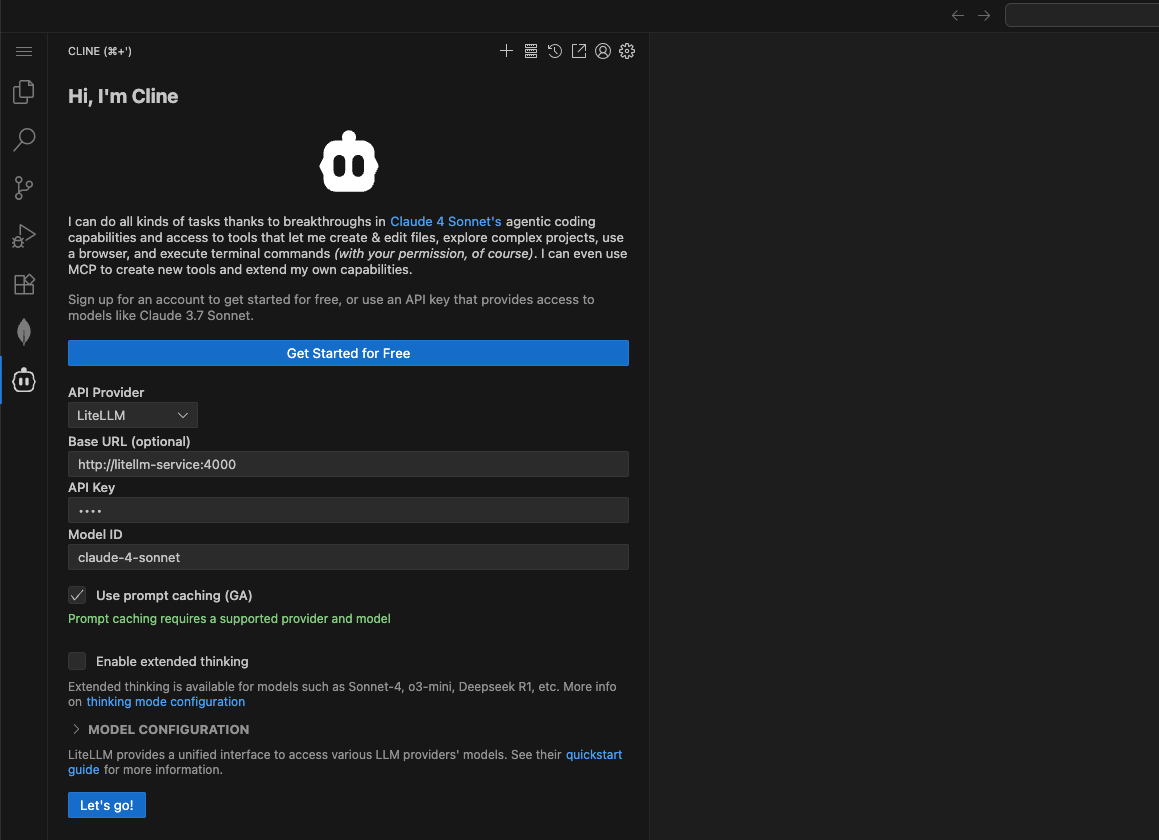
🤖 Step 5: Supercharge VSCode with Cline
- Launch Cline:
- Click the Cline icon in the VSCode toolbar to open the extension.
- Choose Use your own API key when prompted.
- Configure the API:
- Set API Provider to LiteLLM.
- Enter the following LiteLLM settings:
- Base URL:
http://litellm-service:4000 - API Key:
noop - Model:
claude-4-sonnet - Select Use Prompt Caching (GA)
- Base URL:
- Click Let’s go!
- Test Cline:
- Test your setup by entering a prompt in Cline (for example, ask it to tell you a joke).
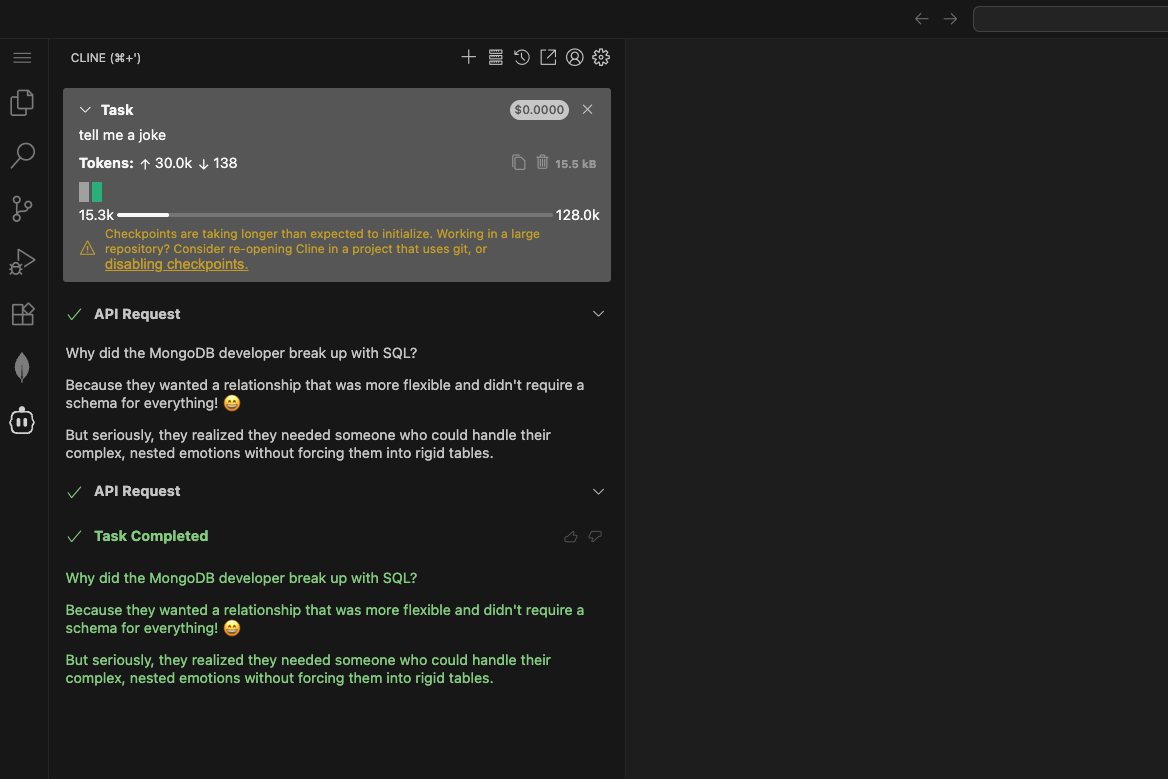
- Test your setup by entering a prompt in Cline (for example, ask it to tell you a joke).
Tip:
If you don’t get a response, double-check your API settings or ask your SA for help!